Robo C2/R2 Multi-Color Filament Switching
This process works great for switching the filament at a specific height of a print, so you can get multiple colors or other effects in a printed object. There is no need to manually edit gcode. We've used this technique on both a C2 and a R2.
Get the Plugin
- Go to https://www.thingiverse.com/thing:2077884
- Download Change Filament At Z Cura Plugin
- Unzip the file Change_Filament_At_Z_Cura_Plugin.zip
Cura
- Close Cura
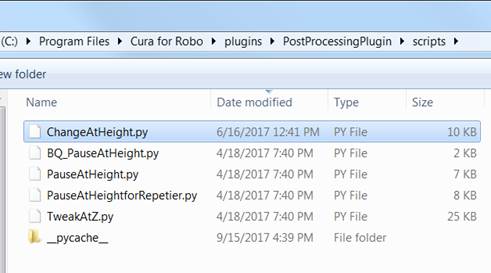
- From the zip, in the files directory, copy the one file ChangeAtHeight.py file into the Cura PostProcessingPlugin plugins folder.
- For my Windows installation, this was at:
C:\Program Files\Cura for Robo\plugins\PostProcessingPlugin\scripts
Done on Robo Cura 2.5, but should work on older versions too.
Mac users will have to fend for themselves as to the directory used.
Making a multi-color print
- In Cura, load your object.
- Determine where you want the color switch to occur in mm, and include the raft. With the default raft (airgap .2mm, Z Overlap, 0.1mm, 3 top layers), this added about 1.5mm. So, to start a new print layer in the object at 1mm, you’ll use a value of 2.5mm.
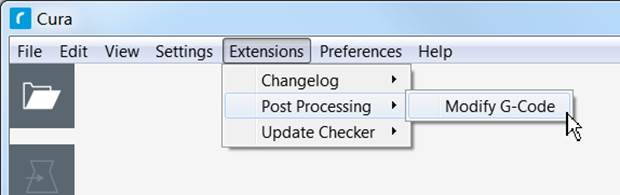
- In the menu, select Extensions, Post Processing, Modify G-Code:
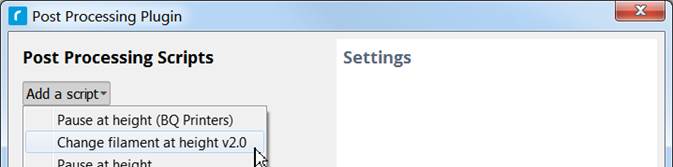
- In the dialog, select Add a script, Change Filament at height v2.0
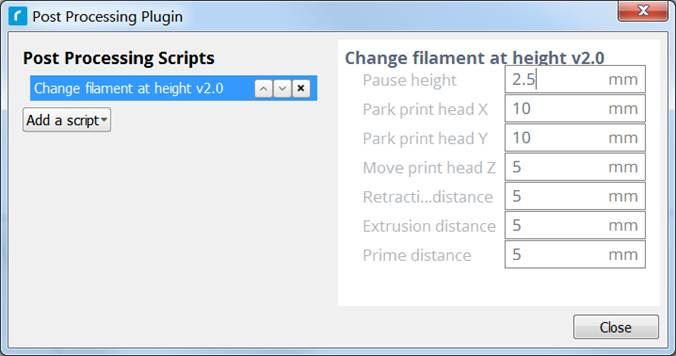
- The Change filament default options appear. Change the Pause height to where you want the color change plus the raft. For our test, we used 2.5mm. You can more filament changes by repeating steps 4 and 5. Close when done.
- After any other Cura options you want are set, select Send to printer.

- The print will start. When the color change is to occur, it will Pause, the bed will move down, and the extruder will move the front.
Option 1 (Recommended)
On the C2/R2, press Utilities, Wizards, Filament Change, and follow the wizard. During the last wizard step, be sure to run the new filament until the new color is extruded, plus perhaps an additional inch or two to clear out the old color. Exit the wizard and tap Resume on the Printer. Remove the drips from the extruder and press Resume a second time.
Option 2
Rather than using the Wizard, you can just pull out the filament and insert the new one. This is faster, but the color change is not as clean. The extruder will still have some of the old color and it may appear in part of the next layer and/or mix with the new color for a short period. The hot PLA may also get on the cooler parts of the feed system, which is not great either. Press Resume. Remove the drips from the extruder and press Resume a second time.
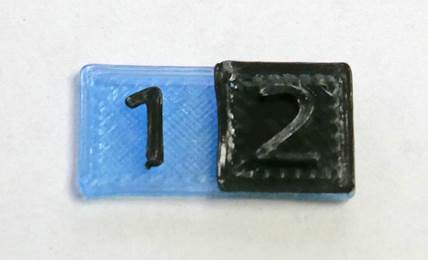
Results
Here’s a test print of a 1mm layer of translucent blue, switching to black after 1mm. (Steps-Test-2.stl)
Last Update 29-Apr-2018